-->
Showing posts with label emub. Show all posts

Friday, 11 November 2011

HD BROWS PALETTE…


Back at the beginning of September, the lovely girls from Glossybox got in touch with me & were kind enough to send me their September Glossybox free of charge so that I could share it with ‘effiesmakeupbox’ readers. However, with everything that has been going on I just didn’t get chance to sort out doing a proper Glossybox post which I feel quite bad about. Anyway, it’s obviously way too late for me to blog about the September Glossybox now so, I thought it would be best if I reviewed Septembers ‘star product’ which is, quite obviously, the HD Brows palette.

I have seen quite a few HD Brow palette reviews on other blogs but I thought I’d throw in my two cents anyway as I have been using it every day since I got it & I feel I have trailed it long enough to be able to show you guys how I have been using it & tell you quickly & clearly, exactly what you need to know about the HD brows palette!
HD BROWS PALETTE 1
HD BROWS 3TOPSHOP ANGLED BRUSHEYEBROWS WITH HD PALETTE
 HOW I FILL IN MY EYEBROWS WITH HD BROWS:1. ‘BEFORE’. As you can see, I have nothing on my eyebrows & they are a horrible, straggly mess.
2. I start by shaping my eyebrows with ‘ASH BROWN’. As it’s the lightest, it’s the best shade to create a decent guideline without being to bold.
3. I then fill in my eyebrows with ‘WARM BROWN’ as it is the closest match my hair colour & best suits my skin tone.
4. I fill in any areas that need ‘extra shadow’ eg, the gap right under my eyebrows, with ‘CARBON’. Using a slightly darker colour makes the gap look less obvious & more natural than if I were only to use ‘ASH BROWN’ & ‘WARM BROWN’.

& wal ah! Perfectly shaped eyebrowz ;)

SHORT & SWEET, ALL YOU NEED TO KNOW ABOUT HD BROWS PALETTE:As you can see from the pictures, the formula is pretty good! It’s buildable, insanely pigmented, it blends easily, the palette doubles up as an eye shadow quad (which is fab if you’re like me & only like wearing minimal neutral eye shadow), it doesn’t look cakey (which is more than can be said for most eyebrow pencils.) & it LASTS.SO.LONG!!!

If you want to see the HD brow palette in action, just watch my little video ;)

Thursday, 29 September 2011

Banana nail tutorial…

BANANA NAILSBANANA NAIL TUTORIAL 9BANANA NAIL TUTORIAL 10BANANA NAIL TUTORIAL 11
*Firstly, sorry for the shoddiness of the photos. It was late so the lighting in the hotel room was naff :/*
Blue: Barry M ‘turquoise’
Pink: Models Own ‘pink punch’
Dark yellow: Barry M ‘yellow’
Light yellow: Models Own ‘lemon sherbet’
Black: Natural Collection liquid eyeliner
So just a little update whilst we still have the internet. :) You may have seen on twitter the other day that I painted my nails in ‘celebration’ of us finding a flat, ( I don’t know why I chose bananas, I just wanted a little change from my usual leopard print that I seem to have been wearing all the time recently. :/ ) We move in tomorrow morning! ^_^ It’s only small but it’s really cute & best of all, it’s pretty cheap! ^_^ I can’t wait to show you guys! would it be sad if I did a ‘flat tour’ video? Ahaha :)
*ps: I might be a little MIA for the next week or so whilst we get the internet sorted in our flat. Thank you for sticking around ;)*

Friday, 9 September 2011

Lipstick mix…

BARRY M PALEST LAVENDER AND TOPSHOP BRIGHTON ROCKBARRY M PALEST LAVENDER 3BARRY M PALEST LAVENDERTOPSHOP BRIGHTON ROCKBARRY M PALEST LAVENDER & TOPSHOP BRIGHTON ROCK2MIXED 1MOUTH 
Check out my wonky front teeth ;)
Barry M: Palest lavender
Topshop: Brighton rock
I bought Barry M ‘palest lavender’ the other week basically just because I fancied trying out a purple lipstick because I thought it might me a nice contrast with my hair…& to be honest, it doesn’t look all that great on me on it’s own as you can see. lol As Lauren put it, you end up looking like a Titanic victim! lol

So after a little while of deciding how to wear it/what to do with it, I finally found it’s perfect ‘lipstick partner’ in Topshop ‘Brighton rock’. Layered together they make the most perfect violet pink!

Also, just a quick note…HOW FREAKING HARD IS IT TO TAKE DECENT ‘LIP’ PICTURES?!?!?!?! FML! Kudos to all you beauty bloggers who make it look a breeze because it most certainly is not! ahhaa!

Speak soon <3

Sunday, 28 August 2011

Models own polishes…

MODELS OWN POLISHES 3MODELS OWN POLISHESMODELS OWN POLISHES 2
So, like everyone else, I took advantage of the Models Own half price sale this week. You’ve got to love Models Own polishes, so easy to apply, their longevity is amazing, great packaging, & some of the most ‘on trend’ & unusual colours for a pretty reasonable buck!

I managed to bag most of the colours I had been lusting over, unfortunately pink explosion & Emerald City were out of stock :( ah well, hopefully they’ll be back in stock soon!

As you can see, I have got a bit of a ‘thing’ for bright neon nails at the moment. I really am so happy with the colours I bought & as always I am so impressed with the colour quality of the polishes & they come out exactly as  they look in the bottle which is fab! My favourite of them all has to be ‘Tangerine Queen’. It’s so bright! I have never seen a nail polish even remotely like it before.

Did you get anything from the Models Own sale? Leave me your links to your blog posts, I’d love to see what colours you all bought! :)

Speak soon <3

Tuesday, 23 August 2011

Barry M peach lip paint…

BARRY M PEACH 2BARRY M PEACH LIP PAINTBARRY M PEACH 4BARRY M PEACH 3BARRY M PEACH 1
Barry M lip paint: 54 Peach
Gosh velvet touch lipstick: 134 Darling
A little bit of a ‘different’ post for me really. I know I said a little while ago that I wanted to make my blog into a little more than just outfits & so it kind of makes sense, being a make-up artist & all, to start up doing beauty/cosmetics posts again, it seems like the most obvious thing to do especially as I want to get back into doing my make-up artist stuff & I feel a little stupid having ‘make-up’ in my blog name when I never post about it, haha.

Anyway, I picked up Peach lip paint the other week on a bit of a whim really. (I have become a little obsessed with orange at the moment so my only proper excuse for buying it is because I liked the colour.) When I first tried it out I was really shocked at how orange it actually was on my lips! Which would be great for a night out or something, but not for my kind of ‘everyday’ make-up. I have been toning down the neon orangyness with a layer of GOSH Darling lipstick over the top which turns it into more of a ‘soft’ peachy/orange which is perfect for my ‘every day’ face. It’s also quite matte so it dried my lips out a little however a little bit of blistex sorted that out, no problem!

I know I keep going on but I really like how ‘peach’ looks against my hair, I wasn’t sure if it would be too much orange but I think it looks sweet! ^_^

Speak soon <3

Monday, 8 August 2011

DIY dip dye shorts…

WHITE LEVIS 501 2DYLON PURPLE AND GREENDIP DYE SHORTS 5DIP DYE SHORTS 6DIP DYE SHORTS 7DIP DYE SHORTS 10DIP DYE SHORTS 8DIP DYE SHORTS 11
Shorts: vintage Levis
Dye: dylon, ‘forest green’ & ‘intense violet’
Studs: this eBay seller
Remember those white shorts I bought at a vintage fair, not to long ago? Well, I knew they wouldn’t be staying white for long! haha. As predicted, I wasn’t getting much ware out of them so, I decided to make them a little more interesting. As you can see I have dip dyed them.

It was a very easy (messy, so if you’re going to do it, I suggest you do it outside!) process. I just followed the dye instructions on the packets & dunked my crisp white shorts into a bucket of dye. & Obviously, no DIY shorts would be complete without studs! Good job I had some left over after making my studded shoes! ^_^

You’ll be seeing these babies in an outfit post soon no doubt!

Speak soon <3

Wednesday, 27 July 2011

DIY studded shoes…

DIY STUDDED SHOES 7DIY STUDDED SHOES 5CONE STUDSDIY STUDDED SHOES 1
Shoes: originally New Look
Studs: This eBay seller


You’ve probably all seen the TS studded loafers knocking about on the blogosphere recently & whilst they are very pretty & I almost succumbed on saturday whilst I was in the Arndale Topshop, I resisted & decided to make my own.


I love these babies! I am so proud that I resisted to urge to buy them ready made! & it worked out alot cheaper in the end too! Win, win! ^_^


Speak soon <3

Monday, 25 July 2011

DIY glitter brogues…

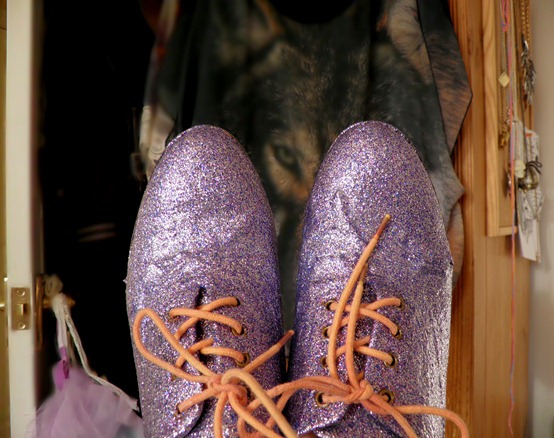
DIY GLITTER BROGUESGLITTERMOD PODGEPRIMARK BROGUESDIY GLITTER BROGUES 5DIY GLITTER SHOESDIY GLITTER BROGUES 3

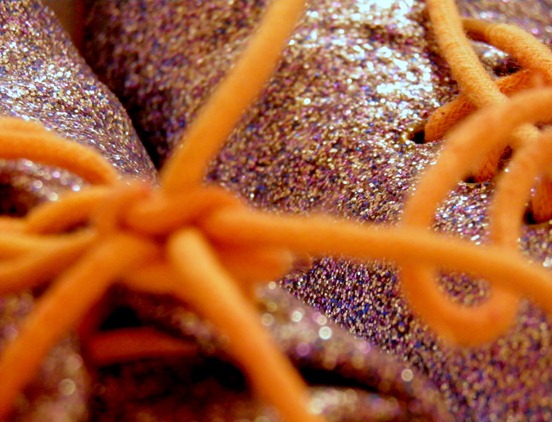
These are now officially the glitteriest shoes I own & they were so easy to make too! I have been wanting to buy a pair of glittery shoes for a while & I really like the silver ones Primark have in their A/W lookbook. However they are not in stores yet & I couldn’t wait so I thought I would just have a go at making my own.

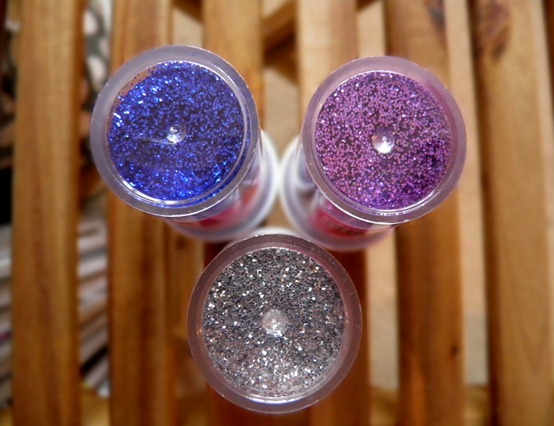
Long story short, I found my old Primark brogues, bought some glitter & glue, mixed the glitter & glue into a paste, painted it all over my brogues & hey presto, I now have a lovely pair of glittery shoes! ^_^

Just bare in mind if you are going to try this out yourself that you have to be quite patient, you have to wait for each layer of glue to dry before adding the next, & it will only work on quite sturdy shoes like brogues/boots rather than say, ballet pumps otherwise the glue will end up cracking whenever the shoes bend.

let me know if you give this a go! Send me your links, I would love to see your DIY’s! ^_^

Speak soon <3

Sunday, 17 July 2011

DIY denim bustier…

1310129168

LOLZ AT MY TRIANGLE TAN LINES >.<
Bustier: DIY
Skirt: New Look
Tights: Primark

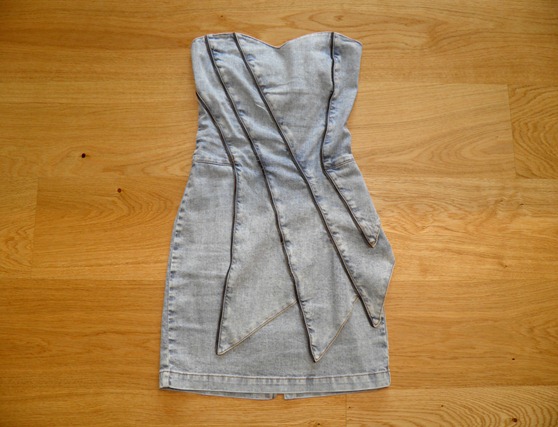
I bought this dress from Miss Selfridge about three years ago & I have only worn it once. I remember buying it because I really wanted a denim dress & I liked the sweetheart neckline. I didn’t particularly like the pointy, flappy, spikey zip things in the skirt but I bought it anyway.

I saw it in my wardrobe the other day & I remembered how much I loved the sweetheart neckline & thought it would be a waste if I didn’t DIY it in some way or another. Anyway, I took my trusty scissors to it, a new zip & a bit of trim later it was transformed it into a lovely new bustier top!

I am really happy with how it has turned out & I am going to get so much more wear out of it now its a top rather than a dress.

What do you think? Did you like it better as a dress or do you prefer my DIY?

Speak soon <3